
How to Paint Stars with Nails Polish.
Prepare your nails: – Start with clean, dry nails that are free of any previous nail polish.- You can shape the nails as desired, such as square, rounded, or pointed.

2.Choose your nail polish color.
– Select a base color that you want to use for the background.
– Choose a contrasting color for the star designs .
.
Apply the base color: Apply 2-3 thin coats of the base color nail polish, allowing each coat to fully dry before applying the next.
Create the star designs:
– Dip the tip of a toothpick or a small dotting tool into the contrasting nail polish color.
– Carefully dot the nail polish onto the base color to create a star shape. You can make small dots for tiny stars or larger dots for bigger stars.
– Place the stars randomly across the nail or arrange them in a pattern.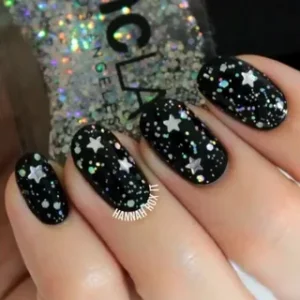
Add top coat:
– Once the star designs are dry, apply a clear top coat to seal in the design and give the nails a shiny, smooth finish.
Tips:
– Practice on a piece of paper or a nail wheel before painting your actual nails to get the hang of the star technique.
– Use a quick-dry top coat for faster drying time.
– You can also experiment with different nail polish colors and star patterns to create unique designs. 1. Use a sponge for larger star designs:
– Cut a small piece of makeup sponge.
– Dip the sponge into the contrasting nail polish color.
– Dab the sponge onto the nail to create larger, more irregular star shapes.
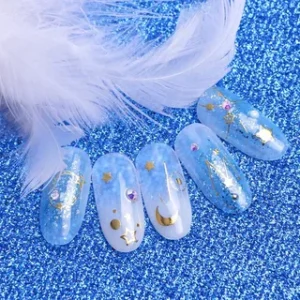
2.Try metallic or glitter polishes – Using a metallic or glitter nail polish for the star designs can add extra sparkle and dimension.
– The reflective finish of these polishes can make the stars really stand out.
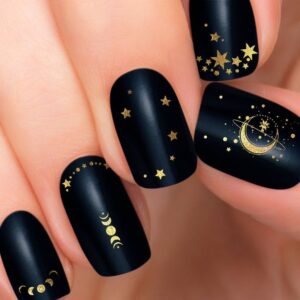
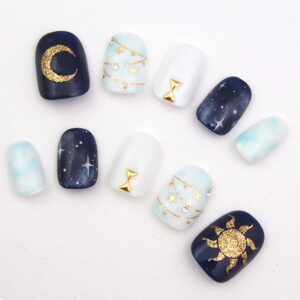
3.Create a galaxy effect:
– Apply a dark blue or black nail polish as the base color.
– Use a dotting tool or toothpick to create clusters of small white or silver stars.
– Add a few larger, scattered stars in different sizes for a galaxy-inspired look.
4.Experiment with different patterns:
– Try arranging the stars in lines, grids, or a scattered, random pattern.
– Group the stars together in the center of the nail or spread them across the entire nail surface.
5.Add nail art accessories:
– Use small star-shaped nail art stickers or decals to add extra detail and dimension.
– Apply a thin, glittery top coat over the star design for extra sparkle.
6.Gradient star nails:
– Apply a gradient base color, starting with a lighter shade at the cuticle and gradually getting darker towards the tip.
– Use a small dotting tool or toothpick to create star designs in the darker areas of the gradient.
– The gradient effect will make the stars appear to be shining in the night sky.
7.Holographic star nails:
– Start with a holographic or iridescent nail polish as the base color.
– Use a white or silver nail polish to create the star designs.
– The holographic base will give the stars a mesmerizing, multidimensional look.
8.Glow-in-the-dark star nails:
– Apply a glow-in-the-dark nail polish as the base color.
– Use a contrasting color, like white or yellow, to paint the star designs on top.
– In the dark, the stars will appear to be glowing against the luminous base. 9 . Stamping star nails:
– Use a special star-shaped nail stamping plate and a stamping polish to transfer the star design onto your nails.
– This technique allows you to create precise, evenly-spaced star patterns with minimal effort.
– You can then add additional details, like smaller hand-painted stars, to the stamped design.
10.Negative space star nails:
– Apply a solid base color to your nails.
– Use a small dotting tool or nail art brush to carefully paint star shapes using the base color, leaving negative space around the stars.
Read more :Best Colour Combos for Star Nails
– This creates a unique, high-contrast look that can be further enhanced with a matte or glossy top coat.
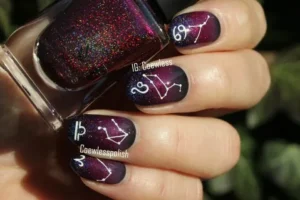
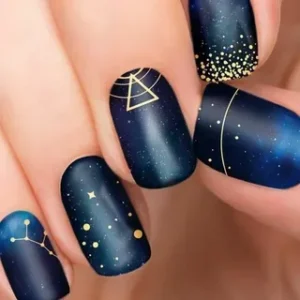
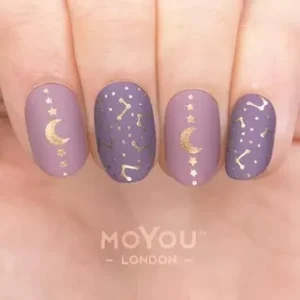
11.Constellation nails:
– Research different constellations and use a dotting tool to carefully recreate the star patterns on your nails.
– Use a dark base color, like navy or black, to make the stars really stand out.
– You can even try connecting the stars with fine nail art brushes to mimic the constellation lines.
12.Shooting star nails:
– Apply a gradient base, starting with a dark color at the cuticle and fading to a lighter shade at the tip.
– Use a striping brush or dotting tool to paint a thick, diagonal line of a contrasting color, like white or silver, to create the “shooting star” effect.
– Add smaller stars around the shooting star for a dynamic, celestial look.
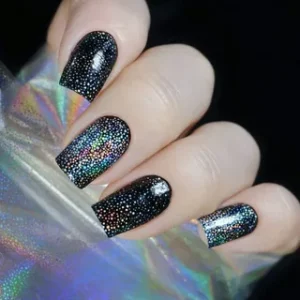
13.Galaxy foil nails:
– Start with a dark blue or black base color.
– Use a makeup sponge to dab on different shades of blue, purple, and pink nail polish to create a swirling, galactic pattern.
– Finish by applying a clear, holographic or chrome foil nail polish on top to mimic the shimmering effect of a galaxy.
14.Ombre star nails:
– Apply an ombre gradient, transitioning from a light shade to a darker one, across the nail.
– Use a dotting tool to create varying sizes of stars throughout the gradient, with more concentrated stars in the darker areas.
– Seal the design with a glossy top coat for a dimensional, celestial look.
15.Nail art brush star nails:
– Use a fine detail nail art brush to carefully paint delicate, intricate star designs on your nails.
– Experiment with different techniques, like creating overlapping stars or using a dotting tool to add highlights to the star points.
– This method allows for more precise and artistic star patterns compared to using a dotting tool alone.

Leave feedback about this