
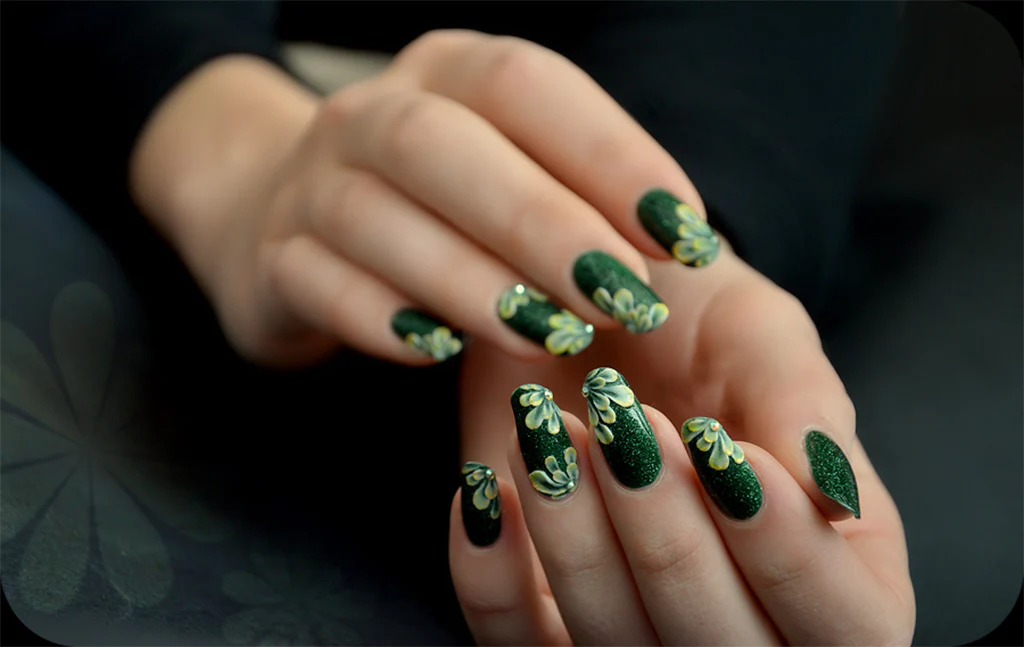
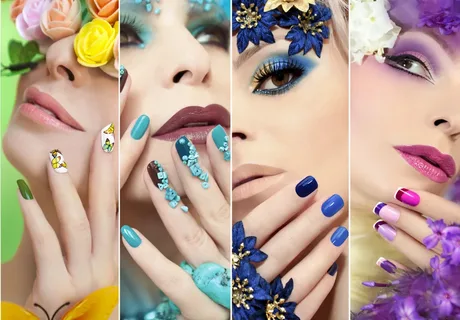
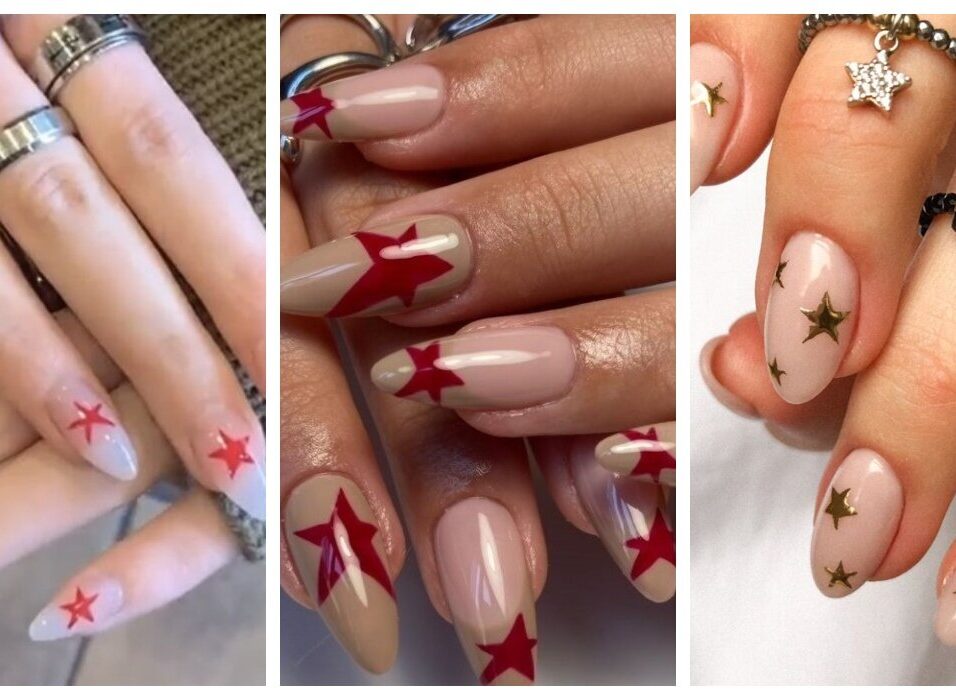
3D Star Nails and Texture
1. Acrylic 3D Stars:
– Apply a nude or pale colored base coat on the nails.
– Sculpt 3D star nails shapes using acrylic powder and liquid.
– Create a textured effect by lightly brushing the acrylic stars with a dry brush.
– Seal with a shiny top coat.
2. Glitter and Resin 3D Stars:
– Paint the nails with a clear base coat.
– Arrange small star-shaped glitter pieces on the nails.
– Pour a layer of clear resin over the glitter to create a 3D, glossy effect.
– Cure the resin according to the manufacturer’s instructions.
3. Sculpted Gel 3D Stars:
– Apply a gel base coat and cure under a UV/LED lamp.
– Use a gel nail art brush to sculpt 3D star shapes on the nails.
– Create texture by lightly stippling the gel stars with a dry brush.
– Cure the gel stars and seal with a shiny gel top coat.
4. Textured Nail Foil Stars:
– Apply a colored nail polish as the base.
– Cut out star shapes from textured nail foil.
– Carefully apply the foil stars onto the nails using a transfer method.
– Seal with a clear top coat to secure the foil.
5. Encapsulated 3D Stars:
– Apply a clear gel base coat and cure.
– Place small star-shaped glitter or rhinestones onto the nails.
– Encase the stars by applying another layer of clear gel and curing.
– Add a textured effect by lightly brushing the encapsulated stars.
– Finish with a shiny gel top coat.
6. Textured Nail Art Powder 3D Stars:
– Apply a sticky base coat on the nails.
– Sprinkle textured nail art powder, such as chrome or holographic powder, onto the nails.
– Use a dotting tool or nail art brush to create 3D star shapes within the textured powder.
– Seal with a shiny top coat.
7. Matte and Glossy 3D Stars:
– Paint the nails with a matte base color.
– Sculpt 3D star shapes using a clear gel or acrylic.
– Leave the star shapes glossy while maintaining the matte base.
– Alternatively, create a contrast by making the stars matte and leaving the base glossy.
8. Embossed 3D Star Stickers:
– Apply a clear base coat on the nails.
– Stick on 3D star-shaped nail stickers or decals.
– Use a dotting tool or nail art brush to lightly stipple the sticker edges, creating a textured effect.
– Seal with a clear top coat.
9. Holographic 3D Star Nails:
– Apply a holographic nail polish or gel as the base.
– Sculpt 3D star shapes using a clear gel or acrylic.
– Sprinkle holographic nail art powder or flakes on the star shapes.
– Seal with a glossy top coat to intensify the holographic effect.
10. Ombre 3D Star Nails:
– Create an ombre gradient nail look, transitioning from a lighter to darker color.
– Sculpt 3D star shapes using a clear gel or acrylic.
– Add textural interest by lightly dusting the stars with a matte nail powder.
– Finish with a shiny top coat.
11. Textured Nail Foil 3D Stars:
– Apply a colored nail polish as the base.
– Cut out star shapes from textured nail foils, such as holographic or metallic foils.
– Carefully apply the foil stars onto the nails using a transfer method.
– Seal with a clear top coat to secure the foil.
12. Flocked 3D Star Nails:
– Apply a colored nail polish or gel as the base.
– Sculpt 3D star shapes using a clear gel or acrylic.
– Lightly dust the star shapes with a flocked nail powder, creating a velvety texture.
– Seal with a glossy top coat.
13. Iridescent 3D Star Nails:
– Apply an iridescent nail polish or gel as the base.
– Sculpt 3D star shapes using a clear gel or acrylic.
– Use a nail art brush to lightly stipple the star shapes, creating a subtle textured effect.
– Finish with a shiny top coat.
14. Negative Space 3D Star Nails:
– Apply a base color and allow it to dry.
– Create a negative space design by painting the nail surface, leaving the shape of stars exposed.
– Sculpt 3D star shapes using a clear gel or acrylic within the negative space.
– Add texture to the star shapes using a dry brush or textured nail art powder.
– Seal with a top coat.
15. Glitter and Resin 3D Star Nails with Embedded Inclusions:
– Apply a base color and allow it to dry.
– Arrange small glitter star pieces on the nails.
– Pour a layer of clear resin over the glitter to create a 3D, glossy effect.
– While the resin is still wet, embed small decorative inclusions, such as star-shaped sequins
or foil pieces, within the resin.
– Cure the resin according to the manufacturer’s instructions.
16. Glow-in-the-Dark 3D Star Nails:
– Apply a glow-in-the-dark base coat to the nails.
– Sculpt 3D star shapes using a clear gel or acrylic.
– Coat the star shapes with a glow-in-the-dark nail powder or pigment.
– Seal with a clear top coat to protect the glow-in-the-dark effect.
17. Textured Magnetic 3D Star Nails:
– Apply a magnetic nail polish as the base.
– Sculpt 3D star shapes using a clear gel or acrylic.
– Use a strong magnet to create a textured, rippled effect on the star shapes.
– Seal with a top coat, being careful not to disrupt the magnetic pattern.
18. 3D Star Nails with Raised Edges:
– Apply a base color and allow it to dry.
– Use a small dotting tool or nail art brush to create raised, 3D star shapes.
– Build up the edges of the stars using a clear gel or acrylic.
– Finish with a matte or glossy top coat, depending on the desired look.
19. Metallic Foil 3D Star Nails:
– Apply a metallic nail polish or gel as the base.
– Cut out star shapes from metallic foils, such as gold or silver.
– Carefully transfer the foil stars onto the nails and press them down firmly.
– Seal with a clear top coat to secure the foil.
20. Textured 3D Star Gradient Nails:
– Create an ombre gradient effect on the nails, transitioning from a lighter to darker color.
– Sculpt 3D star shapes using a clear gel or acrylic.
– Add texture to the star shapes by lightly dusting them with a matte nail powder or glitter.
– Finish with a glossy top coat.
21. Textured Nail Art Brush Stroke 3D Stars:
– Apply a colored nail polish or gel as the base.
– Use a textured nail art brush to create 3D star shapes directly on the nails.
– The brush strokes will create a natural, organic texture to the stars.
– Seal with a glossy top coat.
22. Glitter Ombre 3D Star Nails:
– Create an ombre gradient on the nails, transitioning from a lighter to darker color.
– Sculpt 3D star shapes using a clear gel or acrylic.
– Sprinkle different sizes and colors of glitter onto the star shapes, creating a textured, ombre effect.
– Finish with a shiny top coat.
23. Faux Stone 3D Star Nails:
– Apply a matte nail polish or gel as the base.
– Sculpt 3D star shapes using a clear gel or acrylic.
– Use a sponge or makeup sponge to stipple a textured, faux stone effect onto the star shapes.
– Seal with a matte top coat for a natural, stone-like finish.
24. Neon 3D Star Nails with Crackle Texture:
– Apply a neon nail polish or gel as the base.
– Sculpt 3D star shapes using a clear gel or acrylic.
– Brush a crackle nail polish or gel over the star shapes, creating a textured, cracked effect.
– Finish with a glossy top coat.
25. Marbled 3D Star Nails:
– Apply a marbled nail polish or gel as the base.
– Sculpt 3D star shapes using a clear gel or acrylic.
– Use a dry brush to lightly stipple the star shapes, creating a marbled, textured effect.
– Seal with a shiny top coat.

Leave feedback about this