
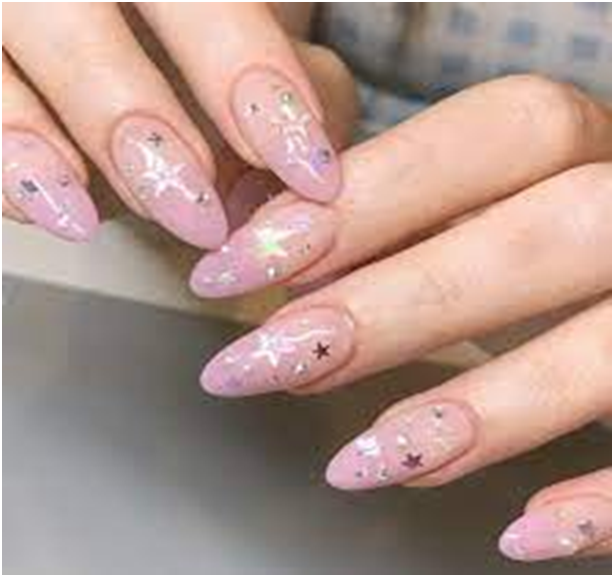
Star Spangled Nails, a Cosmic Delight, Celestial Beauty in Every Light
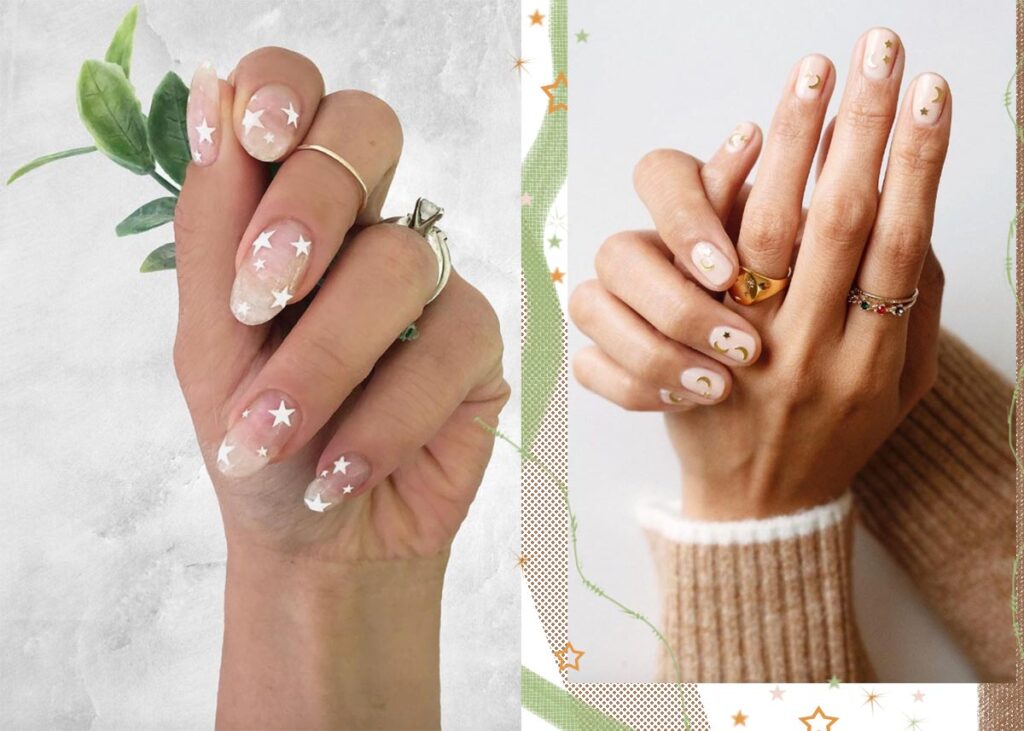
Star spangled nails refer to a nail art technique where tiny stars or star-shaped embellishments are used to decorate or enhance the appearance of fingernails. It can involve various designs, colors, and materials to create a starry-themed nail decoration.
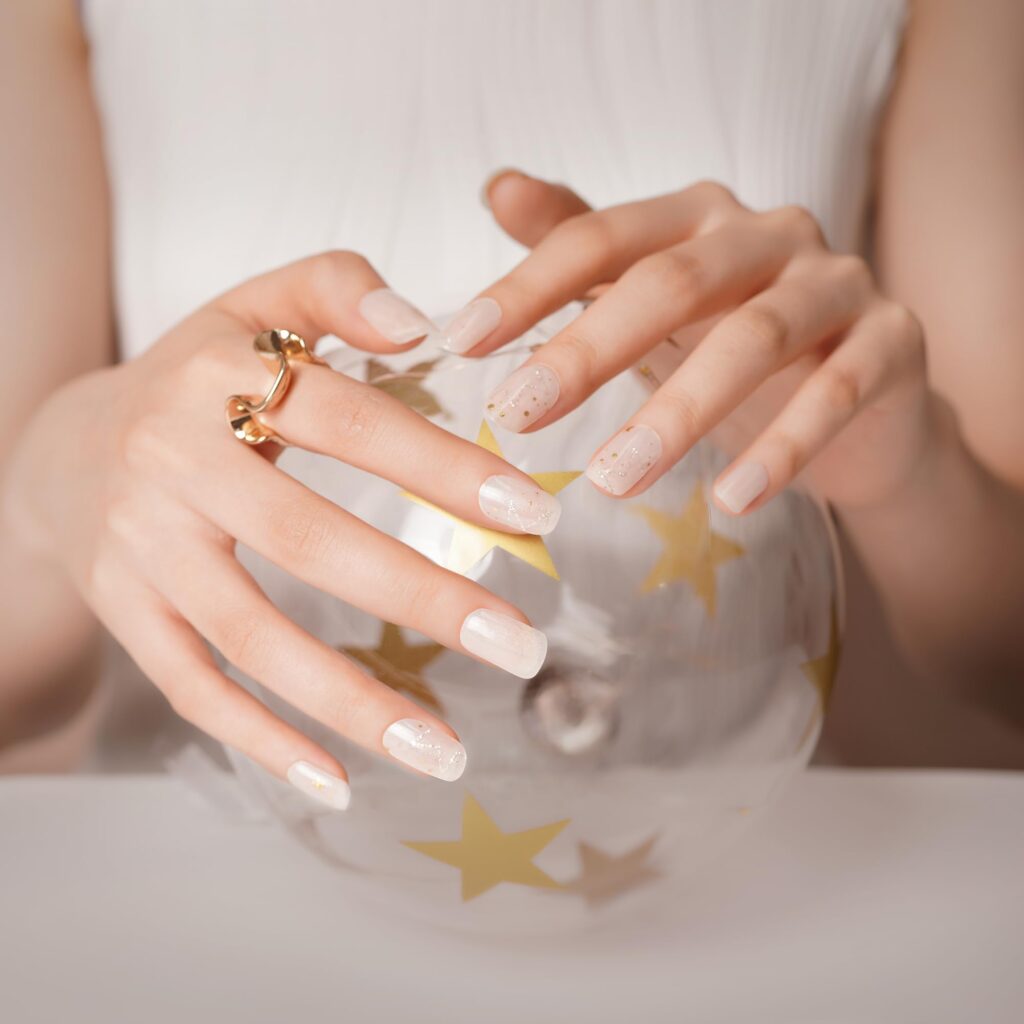
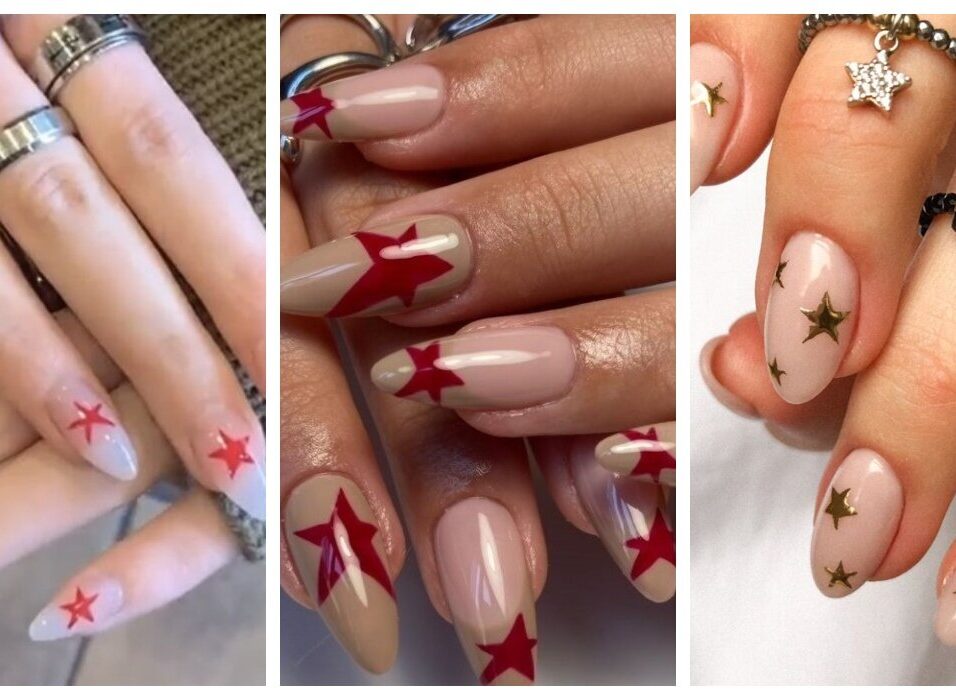
Star nails involve using small stars or star-shaped elements to decorate fingernails in different styles and colors. It’s a fun way to add a starry touch to your nail art!
It is also a nail art. Star nails can be customized according to personal preferences, with variations in color, size of the stars, and placement on the nails, allowing for creativity and individual expression in nail art.
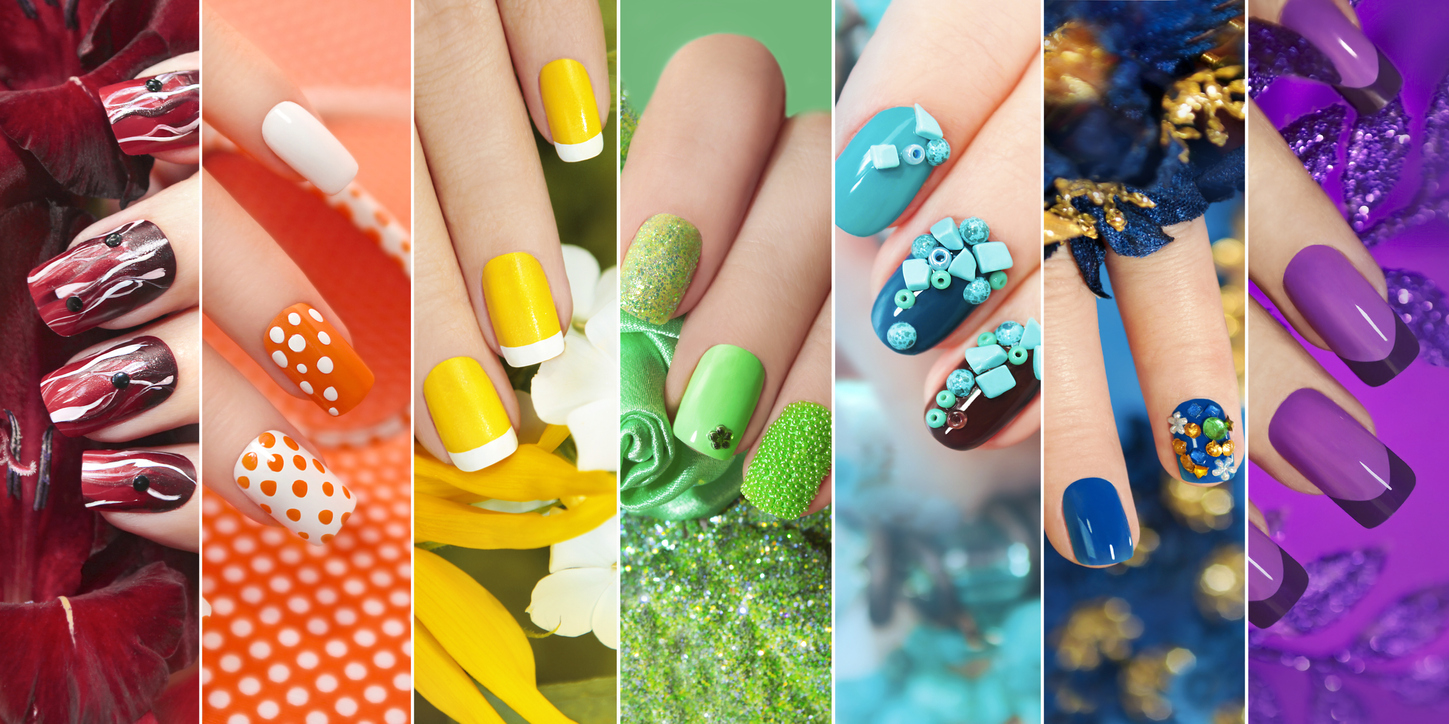
Design Variations of Star Spangled nails
1. Star Patterns:
Stars can be arranged in various patterns like a single star per nail, multiple stars scattered across the nail, or even a group-inspired layout.
2. Accent Nails:
Often, star designs are featured on accent nails, creating a focal point among nails painted in solid colors or simpler designs.
3. Color Combinations:
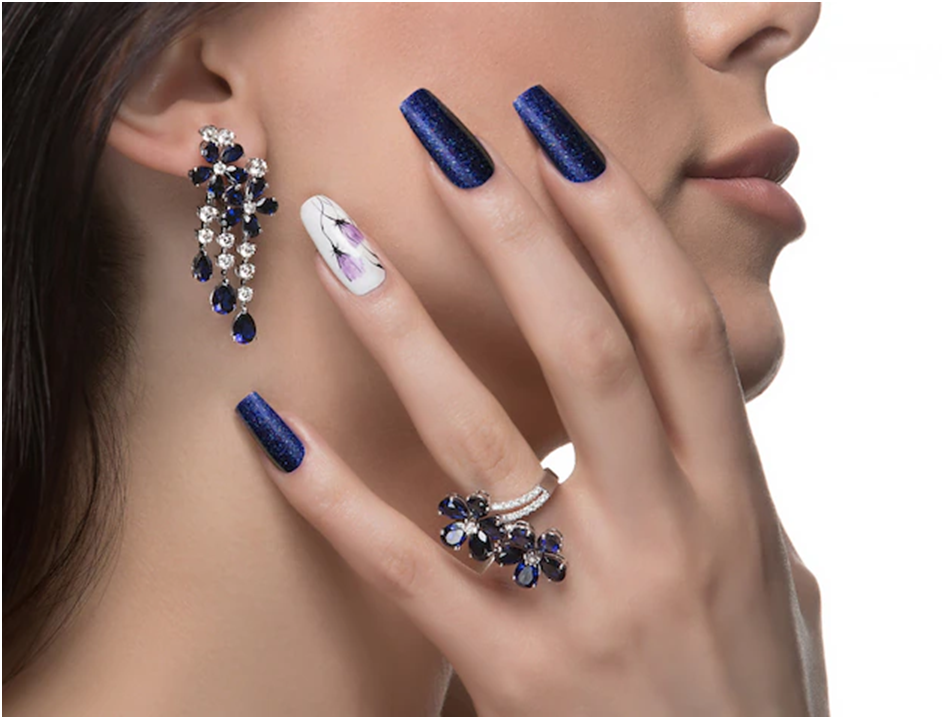
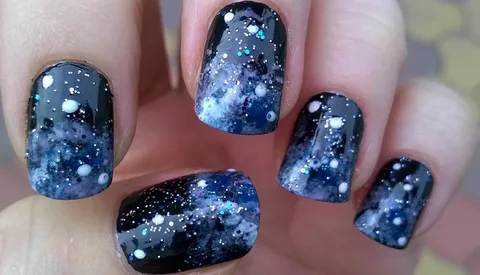
Stars can be of a single color or a mix, set off or different from the base color for a visible effect. For instance, silver stars on black nails or pastel stars on a white base.
Personalization and Trends:
1. Customization:
Nail artists and individuals often personalize their star nail designs with added elements like moons, galaxies, or thematic variations like holiday-inspired stars.
2. Current Trends:
Trends evolve, so new materials and techniques might develop, such as using holographic elements, glow-in-the-dark stars, or blend different textures like matte finishes with glossy stars.
Star nails are a form of artistic expression, allowing individuals to showcase their creativity and style while adding a touch of glamor to their nails.
“Galaxies dance upon each nail, stars alight in a celestial trail.”
“A galaxy at your fingertips, stars gleam, each nail a universe, a stardust dream.”
Advanced Techniques:
1. Layering and Depth:
Skilled nail artists can create depth in star nails designs by layering elements. For instance, placing smaller stars over larger ones or using different sizes to create a sense of side.
2. Rise Stars:
Instead of using solid-colored stars, some artists create rise stars by layering different shades of polish or using shaded techniques within the star shapes themselves.
Maintenance and Care:
1. Top Coat:
Applying a top coat is deciding to seal the design, avoid crack, and add stability. It also gives a glossy finish, enhancing the overall look.
2. Regular Maintenance:
Like any nail art, star nails require maintenance. Avoiding grating chemicals and using gloves during household work can help preserve the design. Touch-ups may be needed if any stars or elements become loose.
Maintenance Tips:
1. Avoiding Damage:
Be gentle with your hands to prevent damaging the nail art. Use gloves while cleaning or doing tasks that might stress or chip the nails.
2. Regular Touch-Ups:
Keep some spare stars and nail glue handy for quick fixes. Care nails regularly to replace any lost or lost stars to maintain the overall look.
Nail Health:
1. Healthy Base:
Organize nail health by using nourishing oils and moisturizers to keep nails and skin hydrated and healthy. This creates a better shade for nail art application.
2. Breather Periods:
Random, allow your nails to rest between nail art applications. Give them a break from polish and designs to stop weakening or damage.
1. Nail art twinkles like the night sky, stars on fingertips, a beauty to spy.”
2. “Stars captured in lacquer, a cosmic dream, adorning nails in a celestial scheme.”
3. “Starry nights at hand’s embrace, each nail a canvas, a celestial grace.”
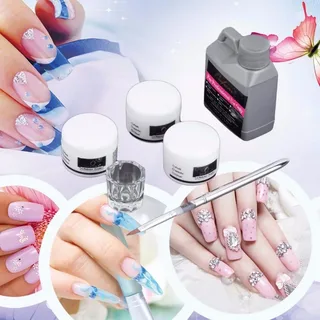
Materials and Techniques:
1. Nail Polish/Gel:
The base layer of nail polish or gel serves as the shade for the star design. It can be a solid color or a rise, allowing the stars to stand out actively.
2. Stars and embellishing Elements:
These come in various forms—raspy covered, zircons, sequins, or pre-made star-shaped nail art elements. They are generally tiny and come in different colors, adding side and sparkle to the nails.
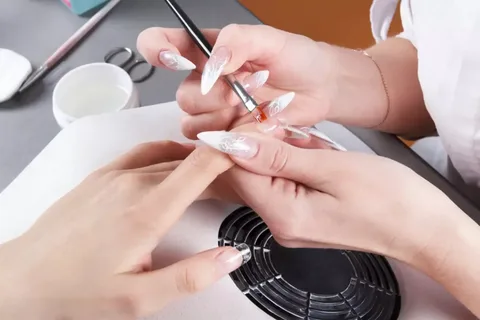
3. Nail Art Tools:
Artists use tools like fine brushes, dotting tools, or just tweezers to handle and place the star-shaped elements correctly. Brushes help in creating complex designs or set out around the stars.
Collaboration with Nail Technicians:
1. Consultation:
When getting star nails done professionally, communicating preferences, colors, and design ideas with the nail technician helps in achieving the desired look.
2. Experimentation:
Don’t wait to try new designs or techniques suggested by nail artists. Their skills can offer fresh views and change styles.
DIY Tips:
1. Practice Makes Perfect:
If trying star nails at home, start with simpler designs and gradually advance to more complex ones as your skills improve.
2. YouTube Tutorials and Guides:
Online tutorials can be awesome helpful for learning new techniques and getting step-by-step guidance on creating various star nail designs.
Remember, the beauty of star nails lies not just in their beauty but also in the individuality and creativity they allow. Feel free to experiment, explore new styles, and enjoy the process of expressing yourself through nail art!
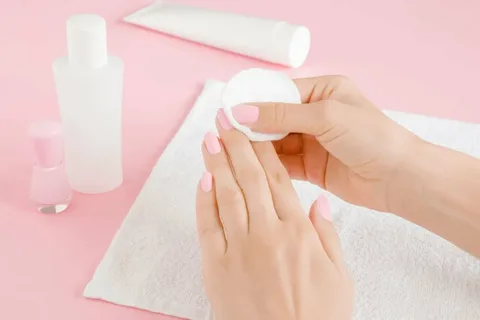
Removing Star Nails Or Any Nail Art Generally Involves A Few Steps To Ensure The Process Is Gentle On Your Nails. Here’s A Guide To Removing Star Nails:
1. Gather Supplies:
• Acetone or nail polish remover
• Cotton balls or pads
• Aluminum foil or nail removal clips (optional)
• Cuticle oil or moisturizer
2. Preparation:
• Wash your hands thoroughly to remove any surface dirt or oils.
• If your star nails have any embellishments like studs or gems, consider gently filing them down to break the seal of the topcoat.
3. Dip the Cotton Balls:
• Dip the cotton balls or pads in acetone or nail polish remover.
4. Application:
• Place a soaked cotton ball or pad over each nail.
• Wrap each finger with aluminum foil or use nail removal clips to hold the cotton in place. This method helps to keep the acetone in contact with the nail, helping in the removal process.
5. Wait:
• Allow the acetone-dip cotton balls to sit on your nails for about 10-15 minutes. This time allows the acetone to dissolve the polish and break down the topcoat.
6. Check and Remove:
• After the waiting period, check if the nail polish has softened or lifted. Gently press on the nail and see if the polish easily slides off.
• Use a gentle twisting motion to remove the cotton ball or pad from each nail. If the polish is still intact, re-wrap and wait for a few more minutes.
7. Clean-up:
• Once the polish is unstick, use a skin pusher or an orangewood stick wrapped in cotton to gently scrape off any remaining polish.
• Wash your hands again to remove any traces of acetone or polish residue.
8. Moisturize:
• Apply skin oil or a moisturizing cream to recharge moisture and nourish your nails and cuticles after the removal process.
Remember, if you encounter any difficulty or if your nails feel sensitive during the removal process, it’s a good idea to seek professional help or consult a nail technician. Additionally, for any stubborn or intricate designs, a nail technician can provide guidance on safe and efficient removal without damaging your nails.
Option 1: Classic Solid Color Nails
•You opt for a classic, solid color on your nails, which looks elegant and suits many moments. It compliments your outfit well and gives an advanced look.
Option 2: Star Nails
• Alternatively, you choose star nails that feature charming arrangements of delicate, shimmering stars. Each nail showcases tiny, sparkling stars set against a rise background,looking like a night sky. The stars add a touch of fantasy and glamor to your overall look.
Scenario:
As you mix at the event, you notice that while the classic solid color nails are elegant and clear, your star nails become a gossip starter. People admire the complex design, and many point of view ask you about the impressive nail art. They realize the creativity and attention to detail that the star nails show, which adds a unique and eye-catching element to your composite.
Throughout the event, your star nails receive a lot of compliments and draw positive attention, becoming a memorable position of your look. Their unique and charming nature promotes your overall style and leaves a long lasting impression on others.
In this framework, the star nails set out and collect more attention due to their unique and original charm compared to the more traditional solid color nails, showing the charm and attraction of complex nail art.
Star nails, like cosmic jewels decorate fingertips, hold a space glamor that transforms each nail into a shade of space wonder. These complex designs, tending to make one think of a collection of, twist a tale of style and charm. Each tiny star, carefully placed, twinkles with elegant grace, showing the nature of a star night. As if kissed by stardust, these nails sparkle and shimmer, casting a spell of beauty that rises above the standard. They stand as a proof to creative skills, each nail a miniature galaxy, a charming and blending of creativity and glamor. Star nails, with their space design, give a touch of space dazzle, painting the world with space skills that delight at every look.
.
Lorem ipsum dolor sit amet, consectetur adipiscing elit. Nibh vel sed amet, ut adipiscing elit fermentum. Orci, feugiat ullamcorper molestie maecenas tincidunt

Leave feedback about this