
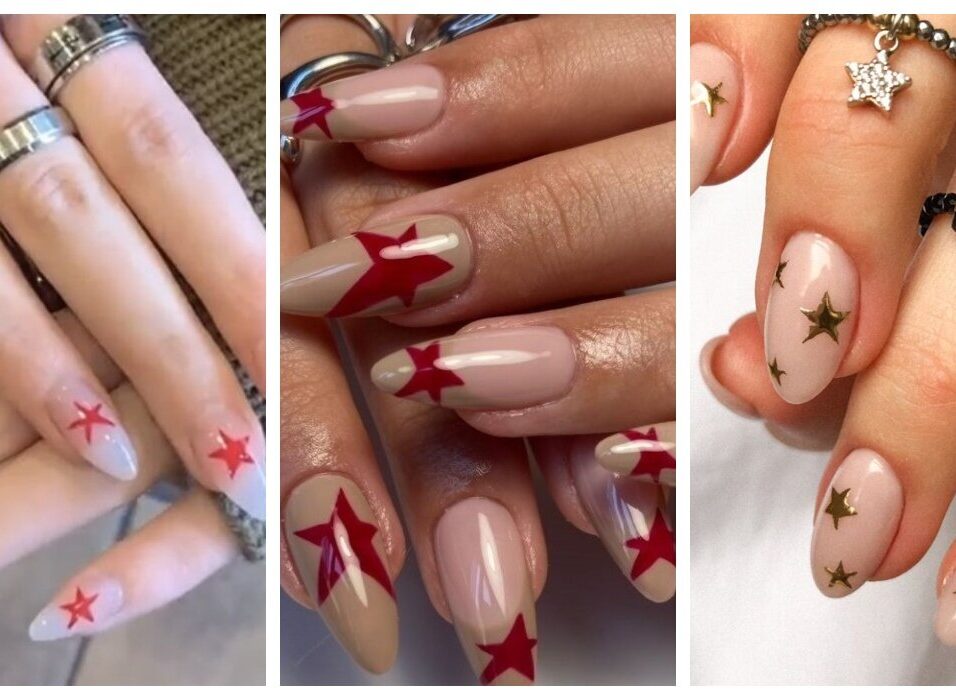
Best Tools for Perfect Star Nails
1. Striping Brushes:
These are thin, precise brushes that allow you to easily paint intricate star nails. Look for striping brushes with a fine, angled tip.
2. Nail Dotting Tools:
Using a dotting tool, you can create the central points of the stars. These tools have different sized metal tips that allow you to make perfect dots.
3. Nail Vinyls/Stencils:
Nail vinyls or stencils with star shapes can be placed on the nails and then filled in with polish to create the star design. This gives you very clean, precise star shapes.
4. Nail Art Pens:
Specialized nail art pens with fine tips allow you to draw and outline the star shapes directly on the nails with polish.
5. Sponge Applicators:
Using a makeup sponge or sponge applicator, you can dab and blend polish to create an abstract star pattern effect.
6. Nail Art Brushes:
Look for detailing brushes with very small, pointed tips to hand-paint intricate star designs freehand on the nails.
7. Nail Stamping Plates:
Plates with star patterns can be used with a stamping tool to transfer the design directly onto the nails.
Tips For Star Nails
1. Nail Vinyls/Stencils:
– Make sure to apply the vinyl/stencil smoothly and evenly on the nail.
– Use a scraper or tweezers to press down the edges for a clean seal.
– Apply the polish in thin, even coats and let it dry completely before removing the vinyl.
– Experiment with different sizes and shapes of stars for variety.
2. Nail Art Pens:
– Choose pens with fine, precise tips for crisp star lines.
– Practice drawing the star shapes on a nail wheel or paper first to get the technique down.
– Start with the center dot first, then draw out the points.
– Use quick-drying nail art polishes for best results.
3. Sponge Applicator:
– Cut the makeup sponge into small, triangular pieces to mimic star shapes.
– Dab the sponge into the polish and then stick it onto the nail.
– Experiment with different polish colors and try ombré or gradient effects.
– Seal the design with a glossy top coat.
4. Nail Stamping:
– Make sure the stamping plate is clean and free of any previous polish.
– Apply a generous amount of stamping polish onto the plate.
– Firmly roll the stamper across the plate to pick up the design.
– Quickly transfer the stamped design to the nail and press down evenly.
5. Freehand Painting:
– Use thin, precise brushes for best control.
– Start with the center dot and paint out the points one by one.
– Consider using a dotting tool to make the central dots.
– Experiment with different star patterns, sizes, and placements.
Some More Advanced Tips for Achieving Perfect Star Nails:
1. Glitter and Holographic Effects:
– Apply a clear base coat first to help the glitter/holo polish adhere.
– Use a glitter or holographic topper polish to create a sparkly star effect.
– Apply the glitter/holo polish over the star designs for added dimension.
– Finish with a glossy top coat to seal in the sparkle.
2. Negative Space Stars:
– Paint the base color of the nail first and let it dry completely.
– Use striping tape or nail vinyls to create the star shapes.
– Apply a contrasting polish color in the negative space around the stars.
– Carefully remove the tape/vinyls to reveal the star shapes in the base color.
3. 3D Star Accents:
– Use a thick, gel-based nail polish or acrylic paint to create 3D star embellishments.
– Apply the polish in layers, allowing each layer to partially dry before adding the next.
– Use a dotting tool or nail art brush to sculpt and shape the 3D stars.
– Seal with a glossy top coat.
4. Ombré Star Nails:
– Apply a ombré gradient as the base color, blending from light to dark.
– Use a striping brush or nail art pen to paint the star designs on top.
– The ombré effect behind the stars creates depth and visual interest.
– Finish with a quick-drying top coat.
5. Reverse Stamping:
– Stamp the star design onto a silicone mat or clear stamper.
– Allow the stamped image to fully dry.
– Apply a base color to the nails, then carefully transfer the stamped star design.
– This technique gives you more control over placement and design.
Get creative and experiment with different color combinations, patterns, and techniques. The possibilities for perfect star nails are endless! Remember to practice and have fun with the process.

Leave feedback about this