Understanding the Process:
Removing star nail or any artificial nail improvement means a light motion to maintain the health of your natural nails. Acrylic and gel nails normally require the use of acetone to break down the product. Here’s a detailed breakdown of the steps:
Step 1: Preparation;
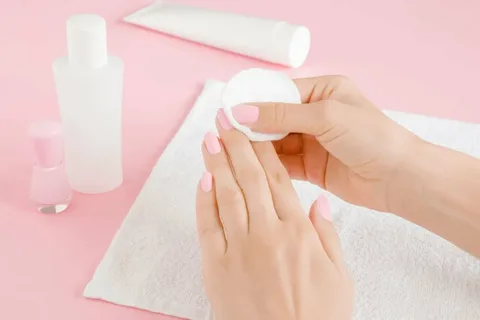
Ensure you have all the necessary materials: acetone, aluminum foil, cotton balls or pads, a nail file or buffer, and cuticle oil or moisturizer. Prepare your workspace in a well-ventilated area and protect the surface you’ll be working on.
Step 2: Initial Preparation of Nails
Use a coarse nail file or buffer to remove the top layer of the nail polish or gel. This step allows the acetone to penetrate the artificial nails effectively.
Step 3: Soaking Process
- Soak Cotton Balls in Acetone: Tear off small pieces of cotton balls or use cotton pads. Soak them thoroughly in pure acetone.
- Apply Acetone-Soaked Cotton to Nails: Place each acetone-soaked cotton ball or pad directly onto each nail
- . Then, wrap a small piece of aluminum foil around your fingertip to hold the cotton in place. This ensures the acetone stays in contact with the nails.
Step 4: Allowing Time to Soak
Let your nails soak in the acetone for about 15-20 minutes. This time frame allows the acetone to break down the acrylic or gel nails effectively.
Step 5: Checking Progress
After the soaking time, carefully remove the foil wraps. Gently push the softened product off the nails with an orange stick or a cuticle pusher. If some parts are resistant, it might require additional soaking.
Step 6: Hydration and Moisturization
- Wash Your Hands: Thoroughly wash your hands to remove any remaining acetone.
- Moisturize: Apply cuticle oil or a moisturizer to rehydrate your nails and cuticles. This step is crucial as acetone can be quite drying to the skin and nails.
Step 7: Finishing Touches
If any residue of the product remains on your star nails, use a nail file or buffer to gently buff it away. However, be cautious not to file your natural nails too aggressively.
Step 8: Post-Removal Care
Give your natural nails a break before applying new nail products. Let them breathe and stay hydrated to promote their health and strength.
Additional Tips for Safe Removal:
- Do not force the removal: Trying to forcefully pry off artificial nails can damage your natural nails.
- Be patient: Soaking takes time, and rushing the process might result in damage.
- “Instead of filing too much, gently buff your nails to take off any leftover product without hurting your real nails.
- If you’re finding it hard or worried about removing the nails on your own, it’s a good idea to get help from a nail expert to remove them safely.”
Pro Tips for Safe and Effective Removal:
- Patience is key: Soaking takes time, and rushing the process may damage your nails.
- Avoid forceful removal: Trying to forcibly pry off the artificial nails can cause harm.
- Moderate point of view: Be fine while pushing off softened product to protect your natural nails.
- Professional guidance: If unsure or encountering difficulties, seek help from a nail technician.
By following these detailed steps and tips, you can safely remove your star nails at home while preserving the health and strength of your natural nails. Always prioritize gentle handling and proper care throughout the removal process.
Conclusion:
Removing star nails or any artificial nail enhancements demands patience and care to protect the health of your natural nails. By following the outlined steps and tips, you can safely remove these nails at home. However, seeking professional assistance is advisable if you encounter difficulties or want to ensure a meticulous removal process without causing damage. Always prioritize the health and well-being of your natural nails throughout the removal process.
Lorem ipsum dolor sit amet, consectetur adipiscing elit. Nibh vel sed amet, ut adipiscing elit fermentum. Orci, feugiat ullamcorper molestie maecenas tincidunt

Leave feedback about this